From the Lab, Resources for Roasters
Sunday, June 5, 2022
This is How We ROEST
As a QC professional working for a specialty green coffee importer, I have the chance to cup some of the finest coffees in the world every day. In order to do our jobs well, my team and I have to roast all of these coffees properly and showcase their full potential. This can be challenging at times, since every coffee is unique and we usually have a very limited amount of sample material to nail the roast. Our ROESTs help us ensure consistent, production-quality roasts on the first try.
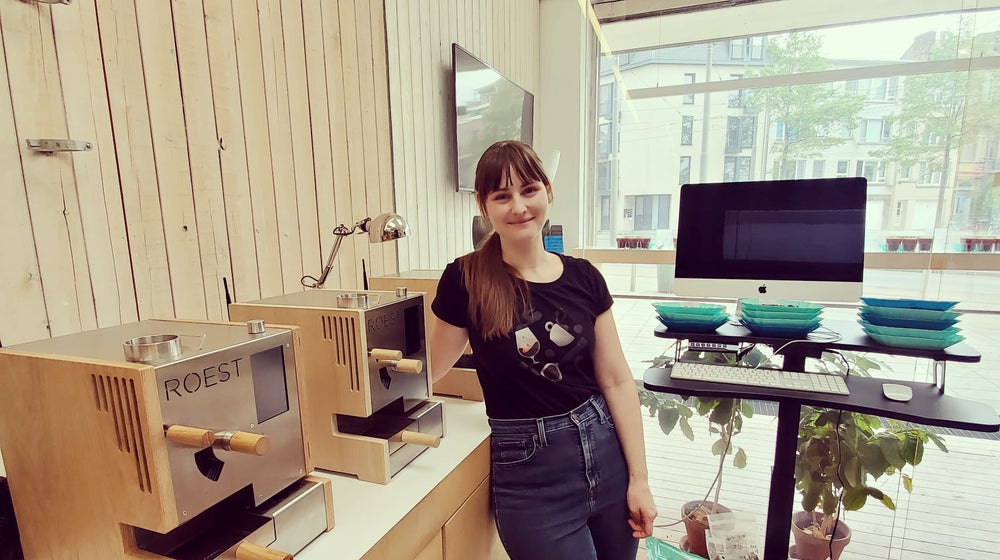
Previously, we were using a traditional 4-drum sample roasting setup. Roasts were very reliable, but we found that the time constraints were just getting to be too much for our small team to manage. It took too much time to complete our roasting work for the day, which included roasting not just for daily offer/approval/arrival cuppings but also roasted samples for clients. We began a trial with a single ROEST machine and were so impressed with the results, we decided to move all our sample roasting to 3-ROEST setup.
In this article, you can learn more about our general roasting approach and the idea behind the current roast profiles we are using. When we started working with ROEST, we used air temperature profiles from ROEST’s online profile library. We had great results with these profiles on some of the coffees, and at that point, we thought that was the most convenient approach because the machine was adjusting the power for itself to reach the desired air temperature. The problem was that we roast a lot of different coffees, and, based on my experience, if we want to achieve more or less the same roast degree on all of them, we can’t just use 1 or 2 profiles on the majority of the coffees without any adjustments during the roast. Of course, air temperature profiles are also possible to adjust during the roast, but I’m an old-fashioned roaster, and for me it just makes more sense to use power profiles. When using power profiles, the applied power is fixed (though you can adjust it manually during the roast) and the air temperature is variable. Power profiles are more similar to traditional production roasting, so I’m more comfortable making adjustments because I can better predict what’s going to happen. During the profile development process, we had a lot of trial and error, but we have ended up being quite happy with the profiles we are using at the moment.
The profiles we’re sharing here are possibly not our final profiles. One of the best things about ROEST is the endless possibilities of trying out different things. I can’t promise we won’t change these over time. We love to play around and experiment and there is always room for improvement.
In our previous articles about sample roasting, we mentioned that we have 5 basic profiles. One for high-density washed coffees, one for high-density naturals, a washed and a natural profile each for lower density or more uneven coffees (blends/high commercial coffees) and one for coffees with extended fermentation/long maceration time. I tried to translate these to the ROEST, keeping in mind the differences between the traditional drum roasters we were using before and the ROEST we are now using. The ROEST, in my opinion, is more similar to a Loring production roaster than to a conventional open drum sample roaster.
Developing the profiles
I quite liked both Matt Winton’s and David Stallings’s power profiles from ROEST’s roast profile library, so I used these as starting point. I was aiming for a little longer roast with a slightly extended Maillard phase. For the rest, we were trying to use the same guiding points that we had developed for our profiles for the drum sample roasters. There is one thing that differs quite a bit from the profiles we used on the drum roasters, and that is the total roasting time. When we started using the ROEST I was trying to keep roasts above 7 minutes, just like we did before, but we noticed that we had much brighter cups if the roast was a bit shorter, especially in case of washed specialty grade lots.
Although we developed a few different profiles to work with, it’s important to highlight that every coffee we roast is different. Thus, we sometimes have to adjust ‘power’ settings or charge temperature based on the density and moisture content of the sample we are roasting (Just a note that in the past, we – like many roasters – have used ‘gas’ as a benchmark, but since ROEST is a purely electric roaster, it’s not heated by gas burners). That being said, we try to roast with minimal changes. We roast hundreds of samples every week, mostly on 3 ROESTs running at the same time, so the workflow is smoother if we use profiles that need few adjustments.
We charge almost every coffee at 200 degrees and start with 30 seconds of soaking. In the case of higher density coffees, we do the soaking with a lower power setting. We then follow this with higher power, resulting in a more dramatic peak ROR. We change this up depending on the coffee, though. For instance, we start high commercial naturals with higher initial energy, but apply heat more gently afterwards. Fan setting is 70% and chamber rpm is 55 with almost every profile during the whole roast. We roast experimental processed coffees with a slightly different approach that I will explain later on.
What to expect in the cup?
Our main goal with roasting is to fully develop the coffee without altering the flavor (to the positive or negative) of the roast profile. We want to reveal all the characteristics of the samples, whether they’re pleasant or not. To ensure fair sensory evaluation, it’s important not to mask any taste defects that come from the green coffee. Samples should be free of any roast defects; such as baked, under-developed or roasty notes. If we notice any of these in the cup, we have to re-roast the sample before passing feedback to producers or exporters. Another great thing about the ROEST is that we can check the log to identify the issue that caused the negative flavors and adjust the parameters accordingly for the next batch.
The high-density washed power profile
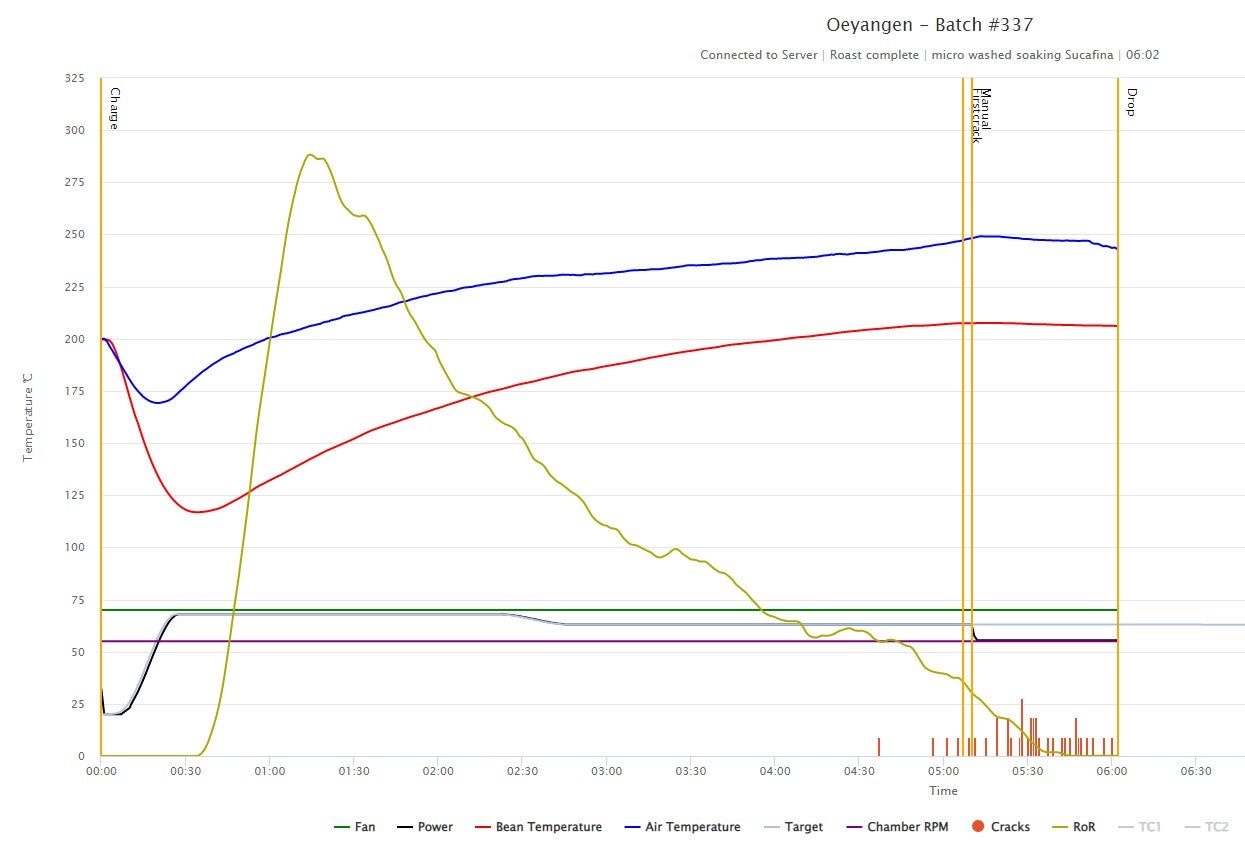
For washed microlots, we do 30 seconds of soaking, starting on 20% power, that we gradually increase to about 70% (this depends on the coffee used). We keep this same power setting for about 2 minutes, then decrease it by approximately 5%. If we know that the ROR of the coffee tends to crash after first crack, we keep this same energy until the end of the roast (maybe even add some extra energy if the ROR is heavily crashing). If the ROR tends to flick, we lower the energy by 10% right after first crack. We aim for 50-55 seconds development and an end temperature around 206-207 degrees. Total roast time is around 6 minutes.
When roasting washed microlots with ROEST, the bean temperature curve tends to flatten a bit after crack. This is something we would prefer to avoid normally, since we would expect these batches to taste baked; however, we noticed that data readings might be a bit different after first crack compared to larger roasters (the roasting chamber is small, so the environment cools down faster), because we had excellent results with this profile, so we decided not to stress to much about this.
The high-density natural power profile
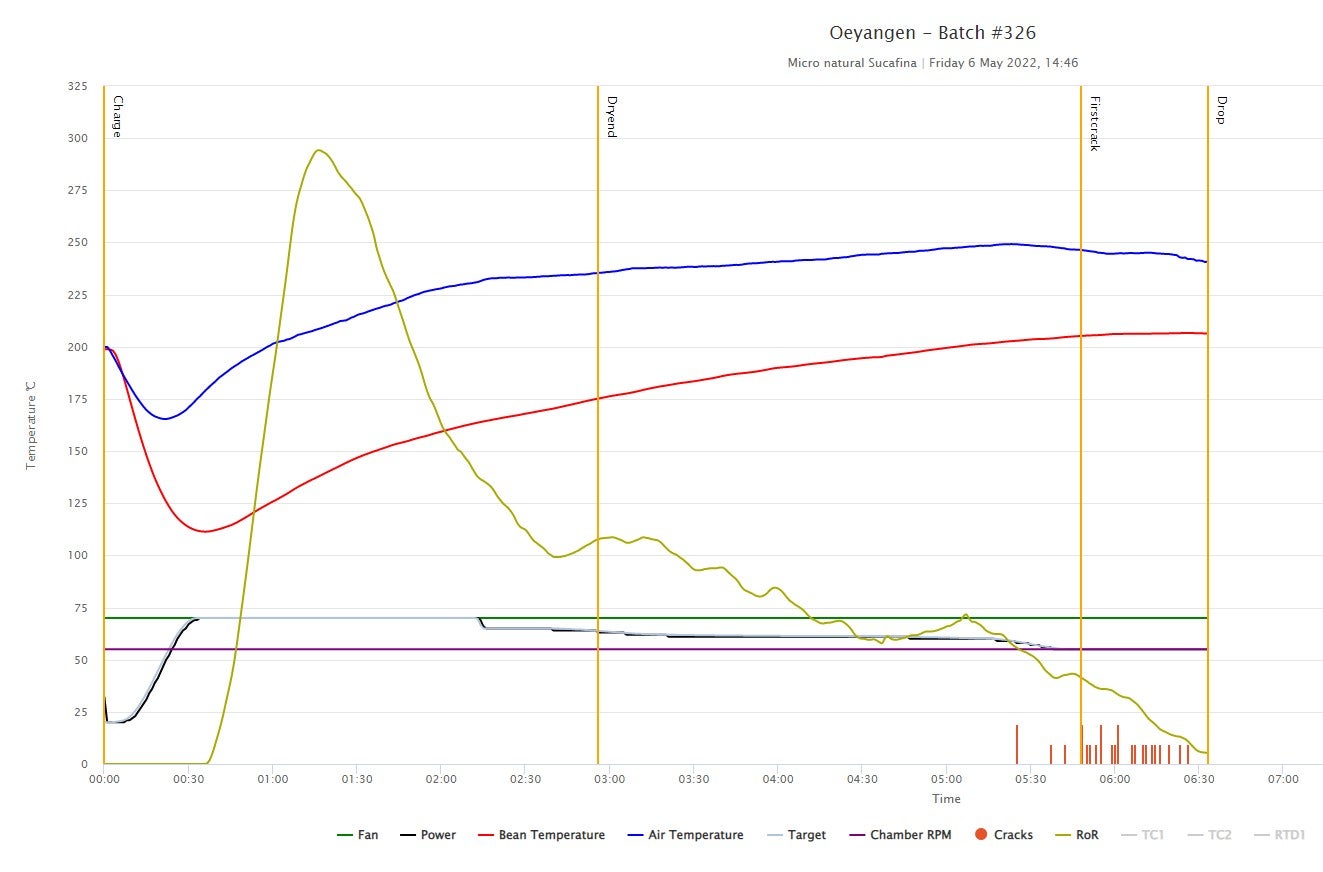
We roast most of the natural microlots and specialty grade naturals on this profile. We start with 30 seconds of soaking, starting from 20% power then use higher power for about 2 minutes. From there, we start to decrease it gradually and constantly until the end of the roast. We want to make sure that ROR is decreasing fast after first crack (but not crashing) to avoid roasty and smoky notes in the cup. Our target end temperature is 207-208 degrees with development time around 45-50 seconds. Total time is 6-6:30 minutes.
The lower density washed power profile
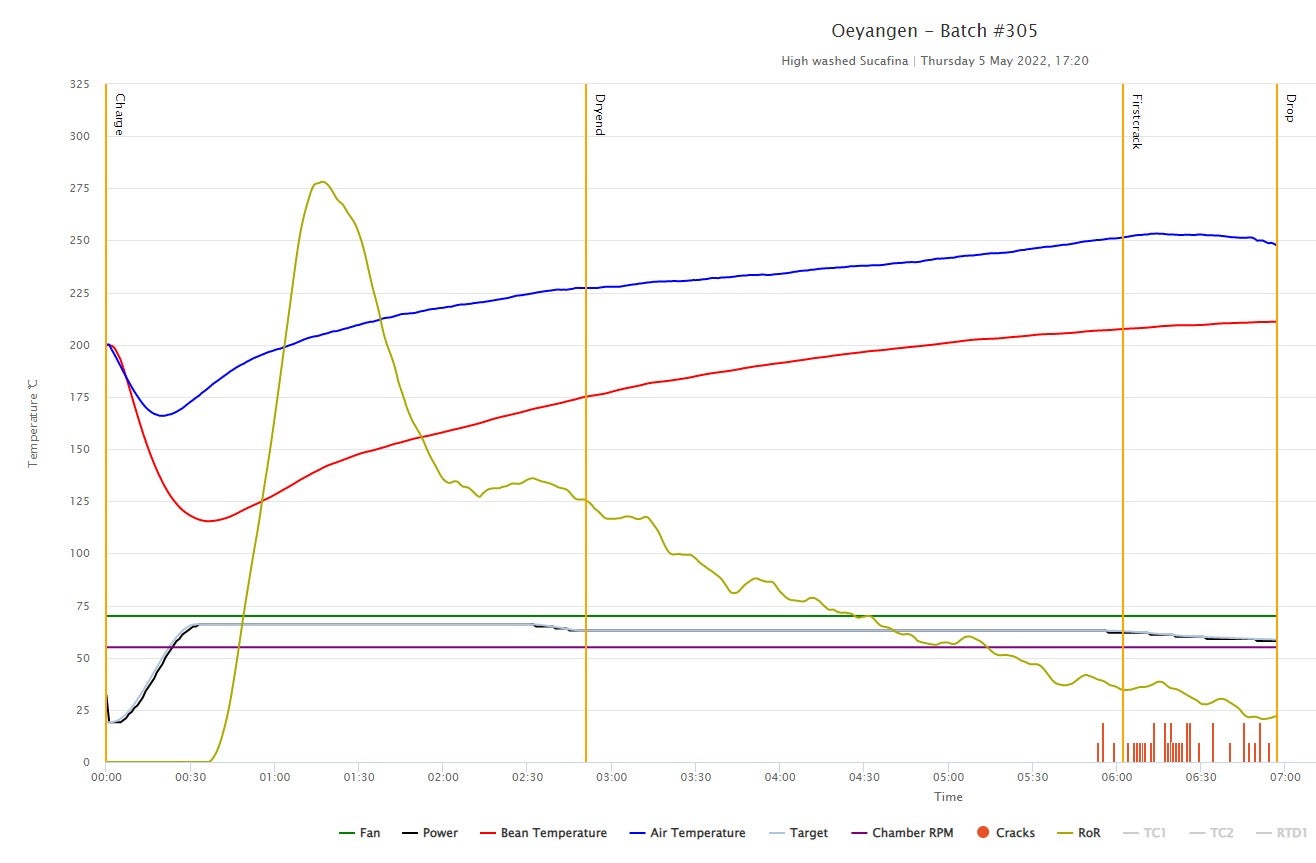
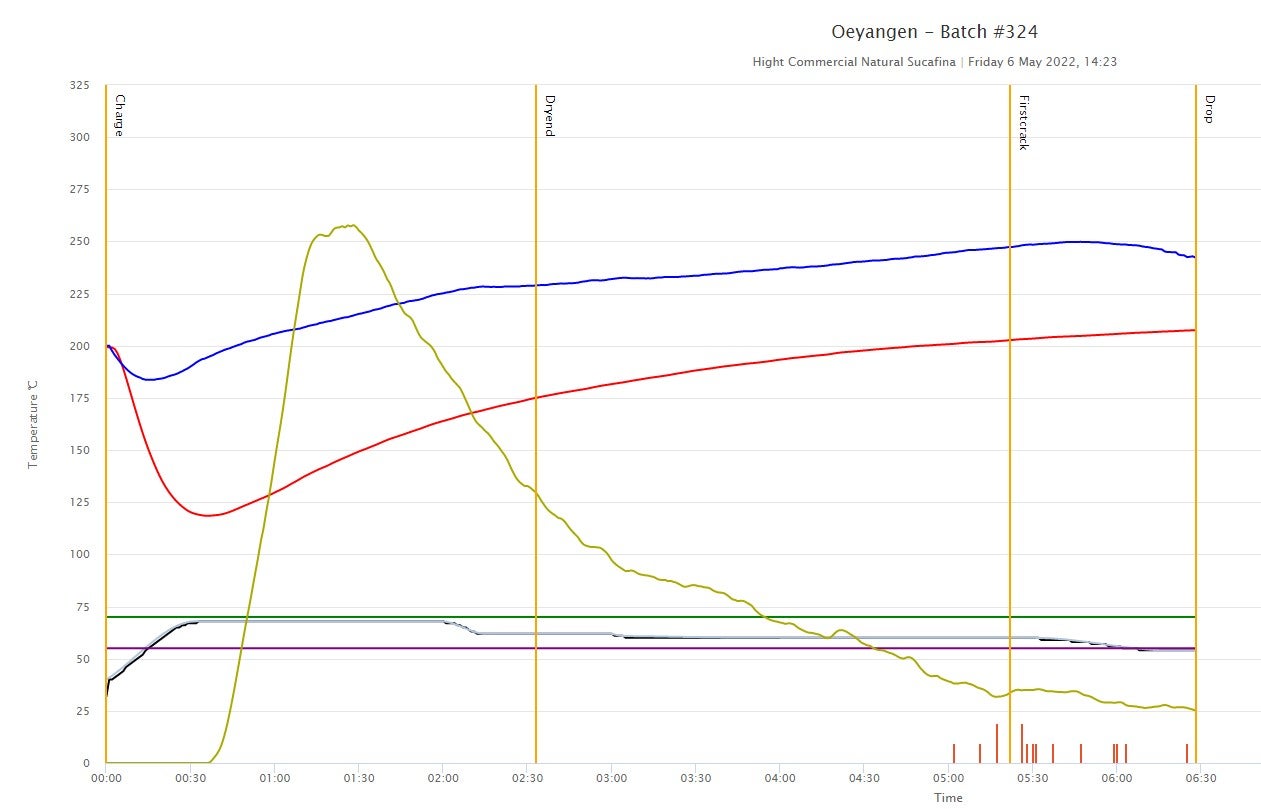
We use this profile for most of our high commercial washed Central American and South American coffees and sometimes for washed Asian microlots as well. We charge the beans at 200 degrees and start gradually increasing the power from 20% to about 68% in 30 seconds. We slightly reduce power around 2.5minutes into the roasting (or around that time based on how the coffee reacts), and from there we keep it the same until first crack. Since usually these high commercial coffees are a bit less uniform, crack can be more spread out in time and has less momentum. Because of this, the ROR will be less likely to crash after first crack, so we can lower gas gradually once crack starts. For these coffees, we are usually aiming for end temperature around 209-210 degrees with 60-70 seconds of development time. If the temperature rises faster, we drop the coffee a bit sooner.
The lower density/commercial natural profile
When roasting commercial/high commercial grades or low-grown natural coffees, we start with 40% power to achieve a lower peak ROR. The highest setting used is actually quite similar to most of the other profiles we use, but we decrease the energy in somewhat bigger steps after 2 minutes. Total roast time is between 6:30-7:00 minutes with end temperature around 209-210 degrees and development time of 60-70 seconds. This profile works well on natural Asian micro-lots too, if development time and end temperature is kept lower.
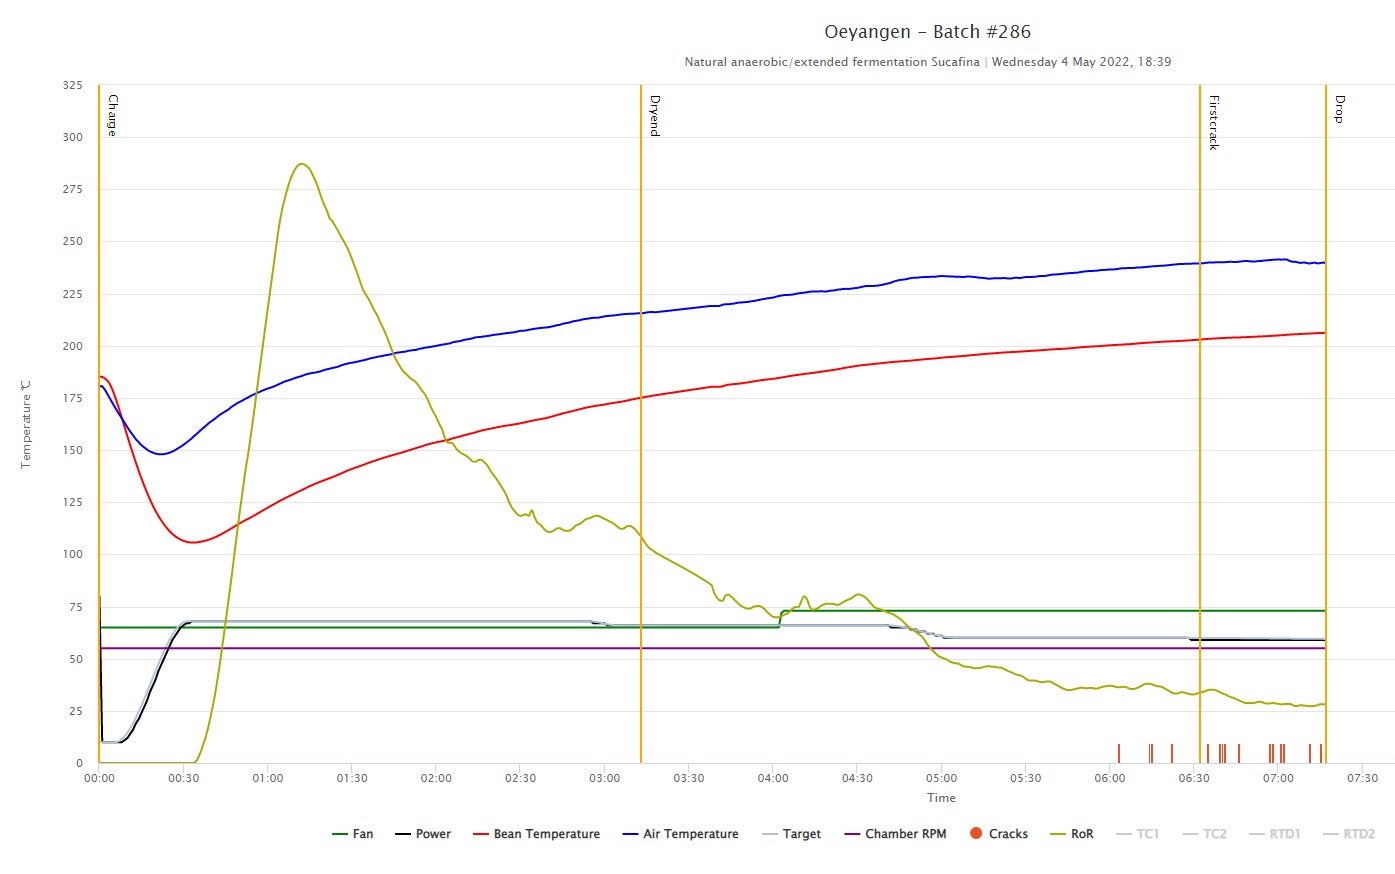
The experimental/anaerobic natural power profile
Although the name might suggest otherwise, we don’t use this profile for every anaerobic sample we roast, but it works well on (mostly natural) coffees that have gone through a very long fermentation time, for example our Colombia microlots. A good indicator of these coffees is the unusual yellow/orange/brownish color of the beans. I wouldn’t really use this profile on other coffees (maybe on some natural Asian samples with low density), because there is a big chance that result would be toasty. We start with a lower charge temperature here: 185 degrees and about 30 seconds of soaking. These coffees tend to burn easily on the outer layer but stay underdeveloped inside, so we want to make sure that we apply heat gradually and carefully to achieve an even roast. We decrease power in 2 steps. First, around 3 minutes to extend the Maillard phase, and later from around 5 minutes until the end of the roast to make sure we don’t hit first crack with too much momentum in the roast. This is the only profile where we adjust the fan during the roast. We want a bit more convective heat and less conductive to avoid tipping or scorching of these delicate beans. We aim for end temperature around 206 degrees and 45 secs development time.
As a green coffee importer (as opposed to, say, a production roaster), our priority is to make the coffees shine (and reflect accurately) on the cupping table. We don’t develop filter or espresso profiles, just focus on achieving similar roast level and even development on every sample. That being said, we love to drink tasty coffee in the office and we hate to waste amazing beans! We have noticed that sample roasts, in general, tend to oxidize a bit faster than production roasts, so they don’t tend to taste as nice when brewed as filter coffee. Luckily, the samples roasted with these profiles (using the ROEST) stay excellent for up to 2-3 weeks – that means lots of tasty coffee for us to enjoy in the office!
If you are as lucky as we are and have the chance to roast on ROEST, give these profiles a try, just bear in mind that every ROEST is unique and you might have to use lower or higher power settings to achieve similar curves on your machine. The temperature of the environment also affects heat transfer, so if you are roasting in a cooler environment you may have to use more power, or, in a warmer environment, less power. Don’t hesitate to reach out to our QC team if you have any questions or feedback, we love to exchange ideas with other coffee professionals.